Introduction: From Game Development to Hard Surface Modeling
Hello everyone! My name is Andrew Grant, and I’m a 3D modeler specializing in hard surface and prop modeling. My journey began with a Bachelor’s degree in Game Development from the Academy of Art University, which I completed online. This allowed me to work full-time while learning, making my transition to the CG Master Academy (CGMA) classes seamless. I gained substantial knowledge in game art, 3D modeling, and cultivated my passion for the field during my time at AAU.
While seeking permanent employment, I worked as a freelance 3D artist and engaged in graphic design projects. I’ve been involved in several professional projects currently under NDA, so unfortunately, I cannot share most of my post-graduation work. After about a year of freelancing, I realized I needed to enhance my portfolio and hone new techniques. I found CGMA to be an excellent opportunity for both. As a result of my augmented skills and improved portfolio, I was recently hired as a 3D modeler for J&F Alliance Group, where we concentrate on AR and VR content for the commercial and government sectors.
Why I Chose CGMA
The “Hard Surface Modeling for Film” class with Jay Machado was my first venture with CGMA. My primary objective was to build upon what I had learned at AAU. I was particularly interested in mastering detailed modeling techniques and exploring advanced Maya functions. Ultimately, I wanted to push myself further than I had before, aiming to create highly detailed models and learn to model vehicles with film-level precision, rather than just game-optimized assets. I also hoped to deepen my understanding of UDIMs, which fortunately were part of the curriculum. Moreover, the ability to learn from Jay Machado, who had worked on my favorite saga, was an incredibly exciting opportunity.
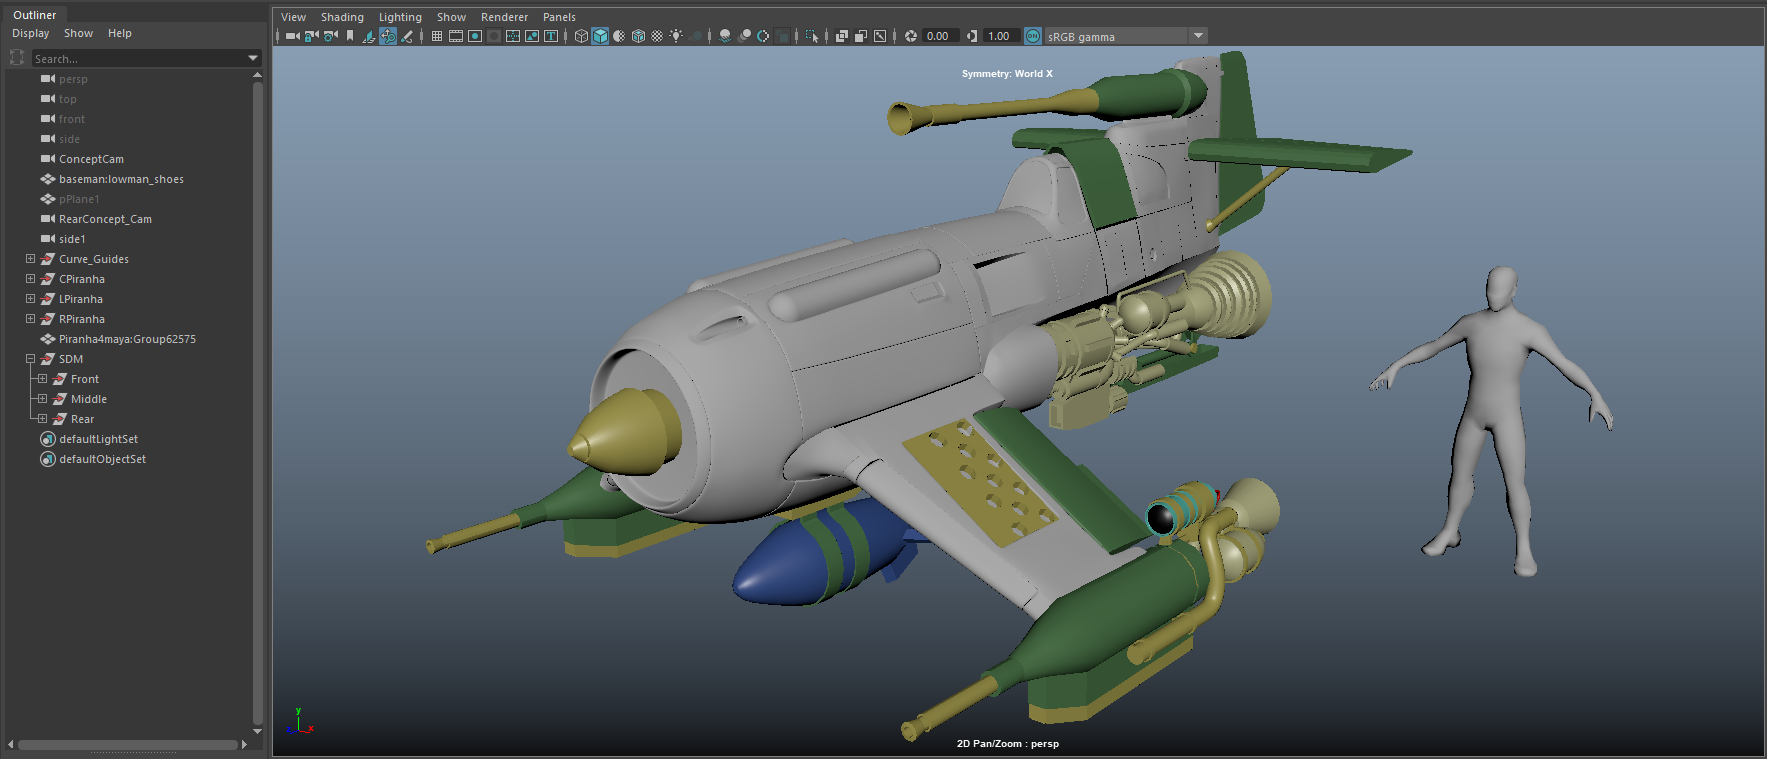
The Concept: Piranha Fighter
We were required to choose a concept from an artist that fulfilled specific criteria. I chose the Piranha Fighter designed by Mike Doscher. The fusion of a futuristic design with a historical plane was highly appealing. My process usually begins with orthogonal views laid out in image planes for initial blocking with primitives. However, in this class, we learned to take a perspective image in the perspective view panel, adjust the camera depth, and align the grid to match the picture’s perspective. Following that, we used NURB circles and CV curves to create a construction guide, lofted them together, and converted them to polygons. This method was challenging for me, having come from a blocking background, because matching the perspective of the image took some getting used to.

The crucial technique involves locking the camera depth once you find it and using the perspective panel as a guide to ensure alignment. Vigilance was essential, as the wings initially appeared wide, but I realized midway that they were closer to the fuselage. This was one of those perspective tricks. Checking the reference in the ortho windows constantly was the only way for me to determine their actual design.

Here, I’ve matched the closest perspective I could find and locked a new perspective camera to use as a reference point for the blockout’s alignment with the concept.

This is the initial blockout. My week 2 modeling was a little excessive, but it paid off in the long run!
Geometry and Detailing Techniques
There were two primary approaches to achieving detail: Zbrush modeling and kit bashing. Once I had the base shape, I used Zbrush to find the panel lines, which was a challenge because, at the time, Zbrush didn’t have a true camera focal length system. After matching it as closely as possible, I sculpted the panel lines and small details. I then used the quad draw tool to create individual panels in Maya.


For finer details, we created a kit bash set as a class, and used those pieces to create functional and detailed elements. While I had been previously taught what kit bashing was for, I never fully understood how to apply it.

Each of us was assigned images of real model kits and tasked with creating the pieces using standard modeling techniques (primitives, extrusion, edge supports, etc.), creating UVs, and combining everyone’s kit bash assignments to make a large library. From there, I positioned and deformed them using lattice and bend tools to create unique details that brought the fighter to life.
The cockpit was especially enjoyable to model, even though I didn’t have multiple concept views available. I researched aircraft cockpits of that era to inform my design. I modeled using primitives and curve extrusions for the wiring, and also used the kit bash components for additional detail.

Challenges Faced and Solutions Applied
I found the key to preventing common modeling errors was frequent smoothing previews. Errors like unintentional double-extrudes or holes caused by unmerged vertices were easily identified and fixed by doing so frequently. The most challenging aspect was rigging the air brakes.

My experience with rigging was limited, as my focus had been on modeling and texturing, which I would then hand over to a rigger or animator. This was mechanical rigging, which I had never done before. I repeatedly rigged the hydraulic piston, and each attempt was unsuccessful – the plate would rotate incorrectly, or the piston would twist. After consulting with my instructor, Jay, (don’t forget to utilize available assistance!) I was able to solve the issue. The problem stemmed from positioning the piston with the existing NURB circle handles. I had to nest them into a group one more time and position the entire group, rather than just adjusting the components within via translation and rotation values. Once everything was grouped, and I removed the dependency on the NURB handles, everything worked perfectly.

Conclusion: Highly Recommended
The class was a fantastic experience and left a great impression. I highly recommend the “Hard Surface Modeling for Film” class to any 3D artist, particularly if they want to deepen their knowledge of hard surface modeling. The live feedback and Q&A sessions were invaluable to my progress. In addition, I networked with classmates and follow them on ArtStation to keep up with their work.
Learning new things can be daunting, but also extremely rewarding. Besides the concepts mentioned earlier, I received a brief overview of Maya’s MASH system, my first application of the Arnold Renderer (I mostly use Iray), and I even used Keyshot for the first time! I utilized those renders and my Arnold turntable animation in my portfolio on Artstation.
I’ll say it again: don’t forget your resources! If you don’t know something, ask. Your friends, coworkers, and especially your instructors are all invested in your success, and when they can help, they will. I’ll conclude with this truth: you will only get out of a course what you put in. This class involved around 10 hours of weekly homework, however, I easily spent 15 to 20 hours, about 3-5 hours daily. I loved every minute of it, and will be looking into taking more classes in the near future.


